Architecture
System setup

First of all, the NDI Tabletop Board in combination with the system control unit (SCU) is seen. The SCU connects the board with the sensors (and theoretically the SIU, which are left out due to simplicity). The board generates the magnetic fields and initializes the 4 sensor coils. Via an USB-B cable the SCU is connected with the notebook on which the Uvis Application runs. The 4 sensors are attached to the wooden frame and the Ultrasound probe. In order for the NDI Aurora system to appropriately work with our notebook, the NDI toolbox and additional drivers need to be installed. In our setup we use the ultrasound system from Esaote MyLabSat. The image from the ultrasound system is connected via a DVI cable to the frame grabber. The AV.io frame grabber from epiphan is then connected via USB to the notebook to which the frame grabber streams the video data from the ultrasound system. The frame grabber normally should work as a plug&play system and doesn’t require drivers. If any issues occur the installation chapter of the code documentation also contains the drivers for manual setup.
Here is the real world system setup.

Entity relation diagram
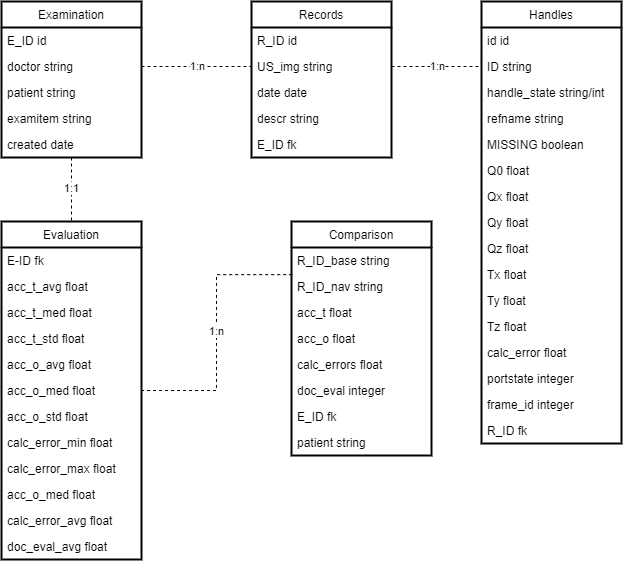
The examination entity is the base entity for the Uvis App. It contains meta data about the examination, like doctor and patient information.
The record entity, represent a performed record during an examination. It contains the recorded image and the reference to the recorded sensor data.
The handle entity represents the handle or a single sensor from the aurora system. It contains all data that the sensor held at a given time.
The evaluation entity holds the evaluation data of a performed examination. It describes for example the translational and orientation accuracy of the examination.
The comparison entity holds evaluation metrics of two compared records. The comparison shows the difference between two records (in general a goal record and the measured navigated record).